TheLorry and Malaysia Digital Economy Corporation (MDEC) has been working strategically since 2020 on developing an effective interface with real-time feedback from our driver-partners. The exchange has brought us positive shifts in the working experience of our drivers and interaction with our customers online. We would like to take this opportunity to thank MDEC for their endless support to TheLorry in developing this application
TheLorry Route Optimization
Are you a merchant who has dozens of parcels or items that need to be delivered to your beloved customer’s house every day?
We bet you must face problems such as:
- Which parcels need to be sent first and which is the last?
- How can you reduce the delivery time and distance by your courier provider so you can save your delivery cost?
At TheLorry, we recently introduced our Smart Routing software so you do not need to worry about your route planning activities. With a couple of clicks, our software will provide you with the best route that your delivery time, distance, and cost.
Here is how you can navigate our Route Optimization software
- First, go to our Smart Routing Website: http://smartrouting.thelorry.com/auth/login, to register for a new account.
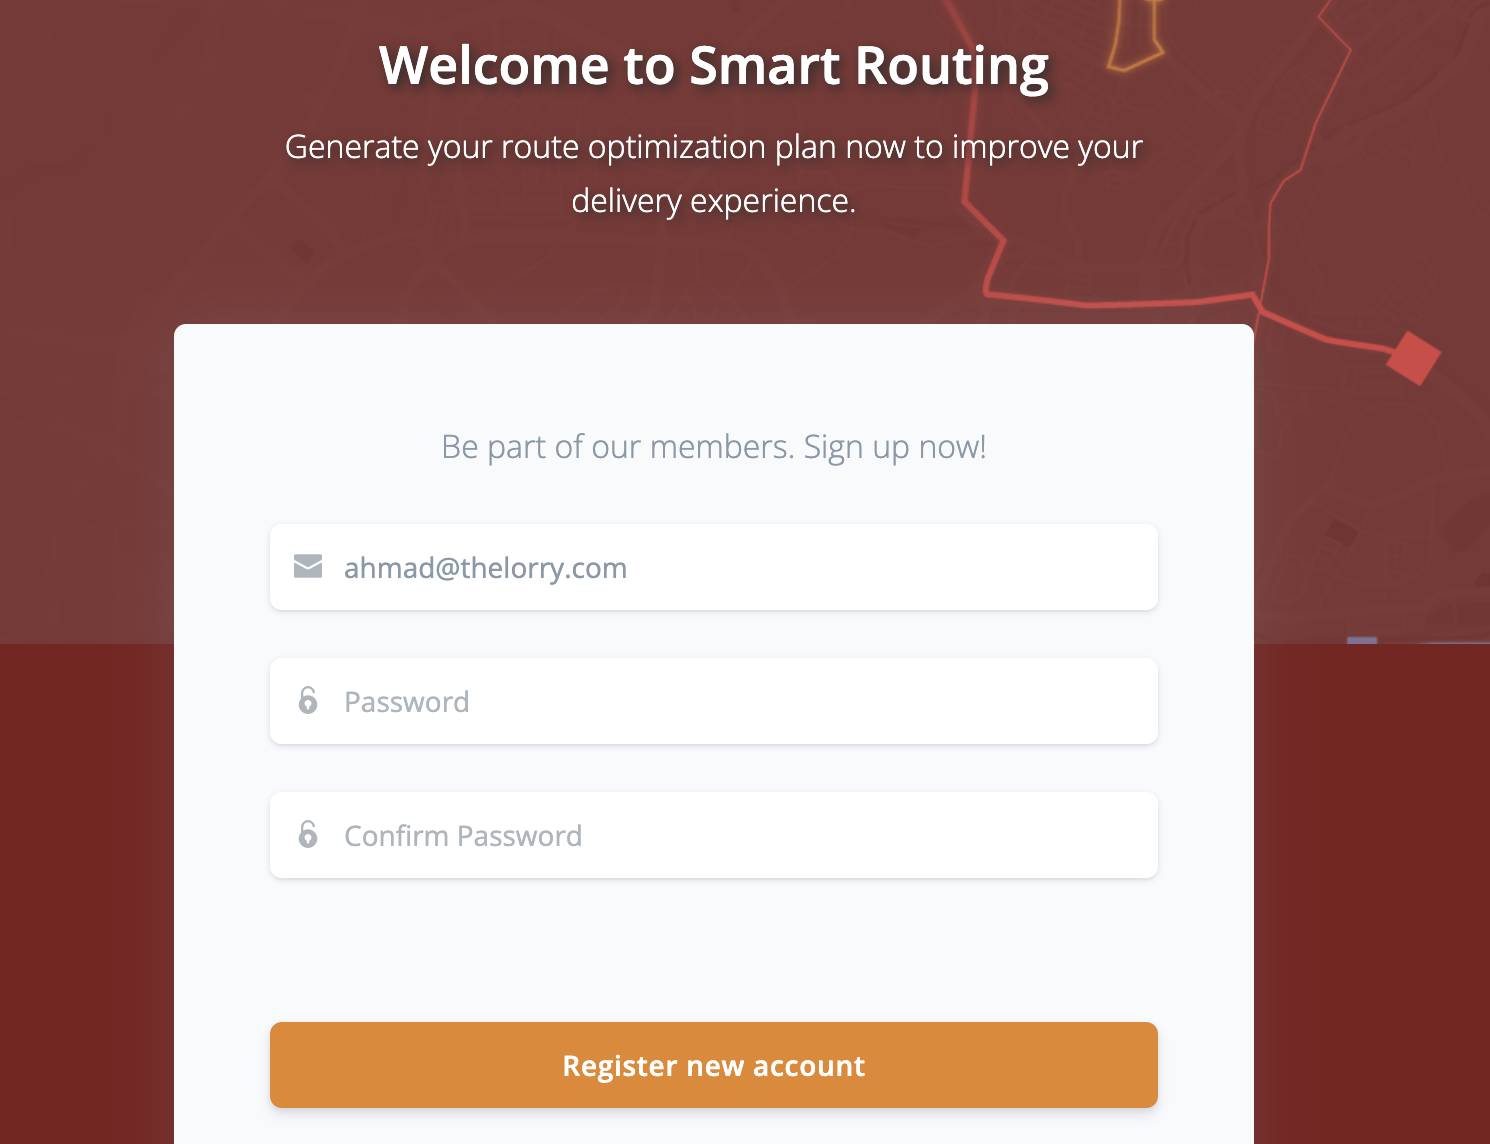
- After completing our registration page and proceeding with login, you will come across the Home Page of Smart Routing Dashboard
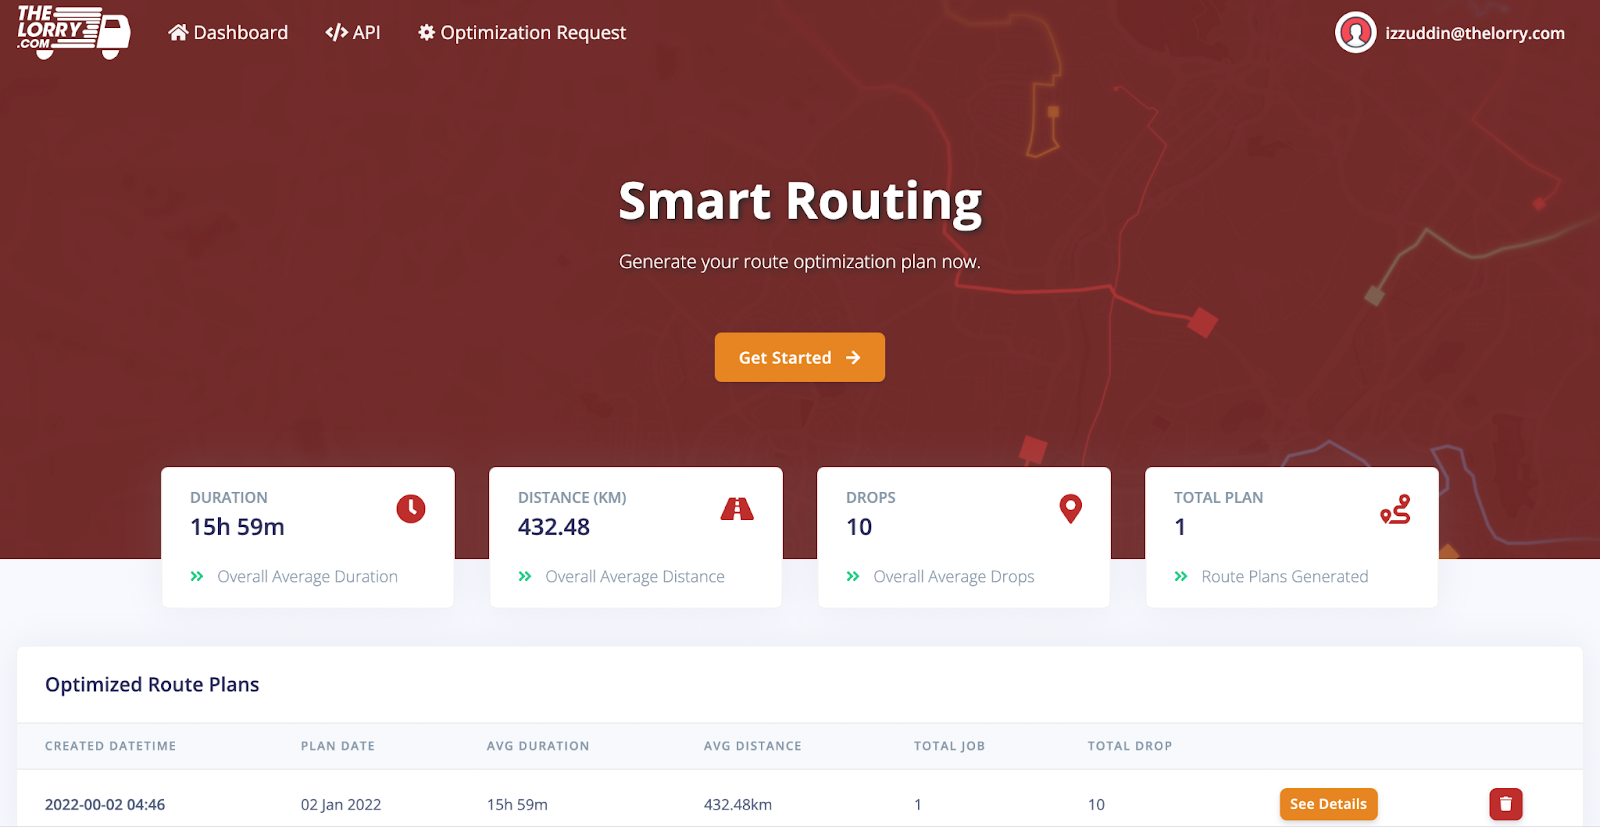
- Click ‘Get Started’ and you will land to our ‘Form Request’ Section
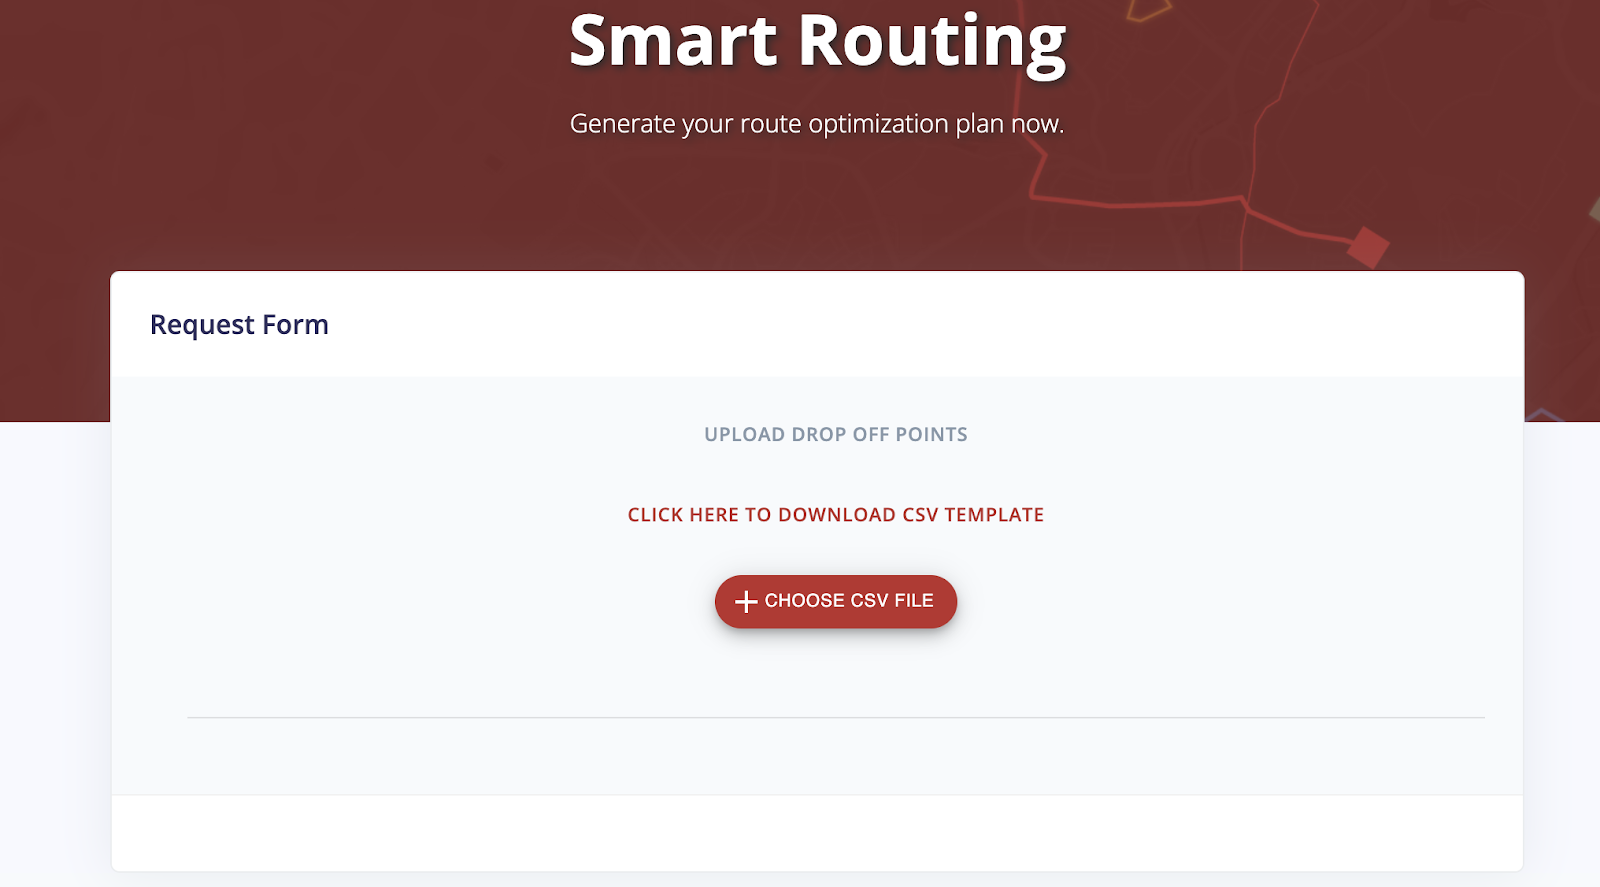
- Under the ‘Request Form’, you need to upload csv file for your customer addresses.

- Bear in mind, you have to follow certain formats to make sure the Smart Routing software is able to read your dataset. In your CSV/excel file, your first column MUST be named with ‘Tracking Number’, and the second column must be named with ‘Customer Address’. Under ‘Tracking Number’, you need to put any unique id for each respective customer address.
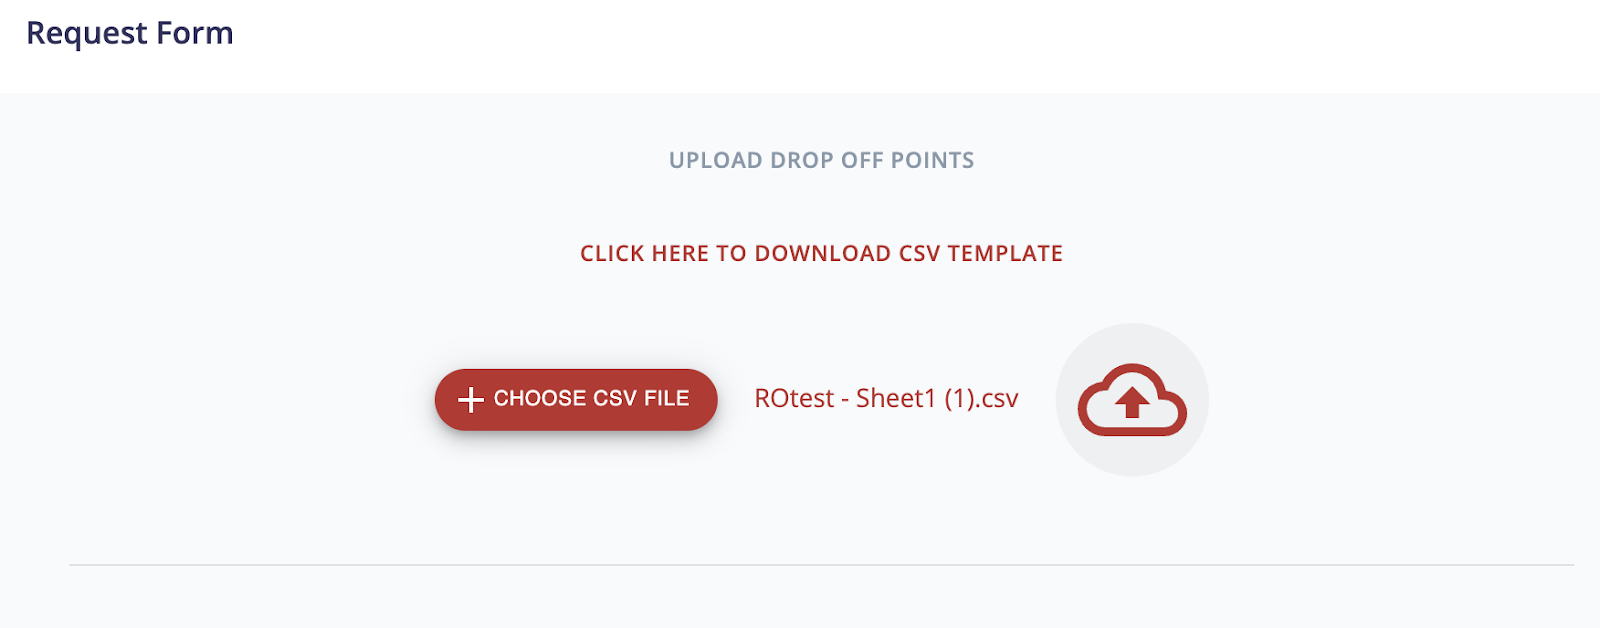
- Once you successfully choose your data set, simply click the upload button at the right. You will notification showing your file has been successfully uploaded.
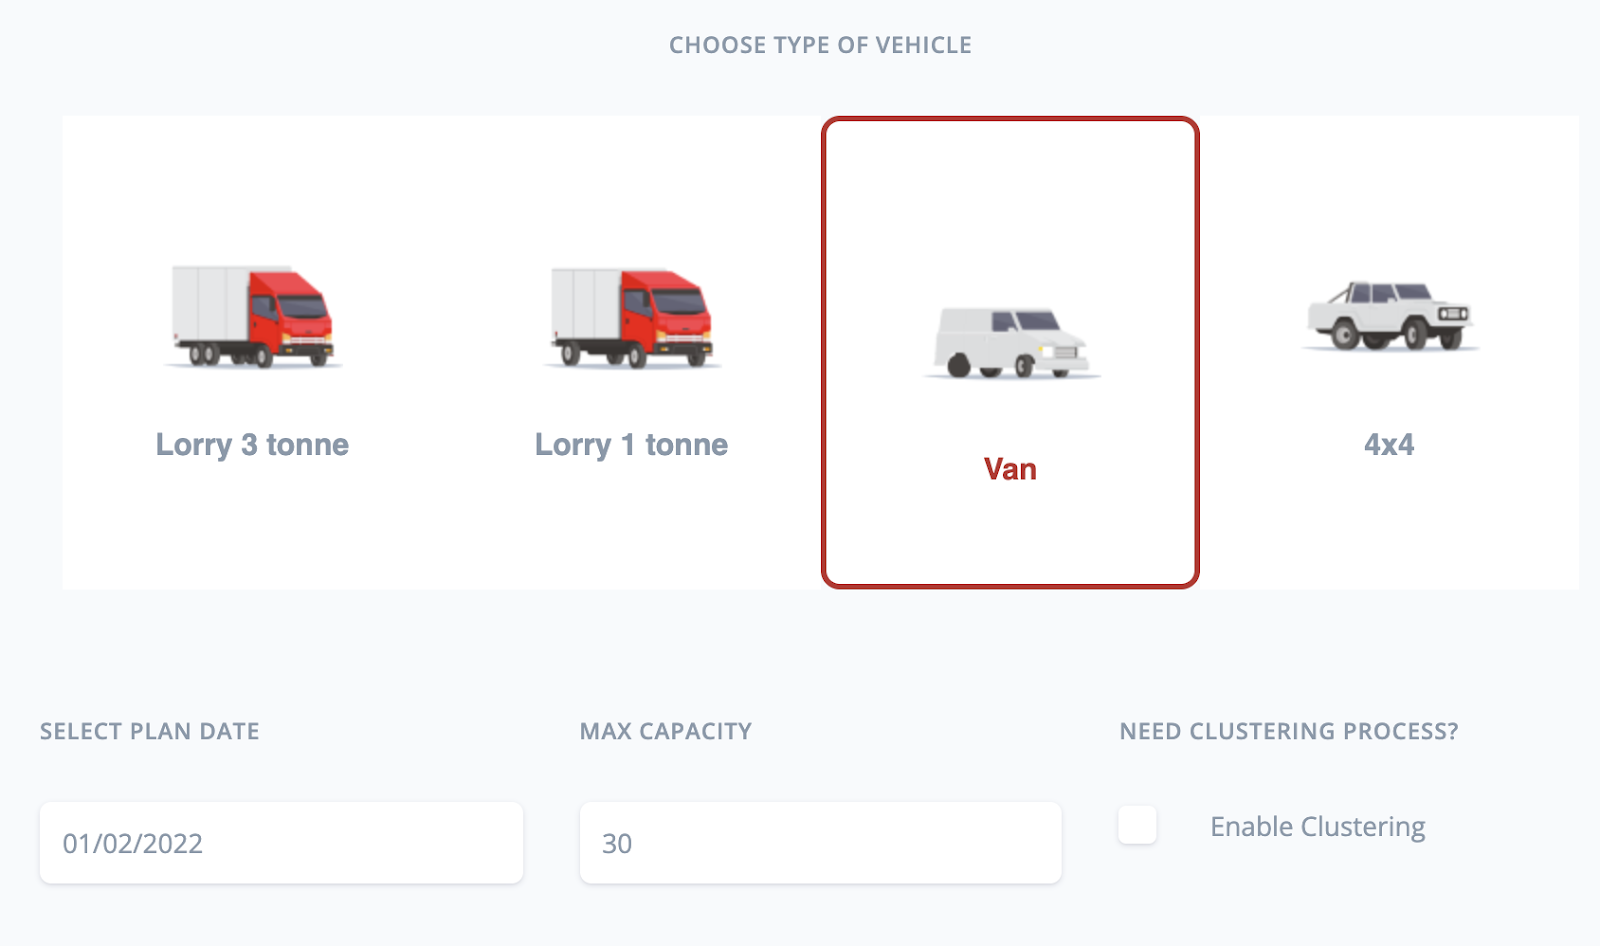
- When you scroll down, you will then need to choose the vehicle for your delivery. Each vehicle has a different max capacity. For example, if your delivery has more than 30 parcels. We advise you to use a bigger vehicle such as a Lorry instead of the van or 4×4. Once done, click submit a request
- Smart Routing calculation time may vary based on the number of customer addresses inside the csv file. Once the calculation is complete, you will receive a route planning file sent to your email.
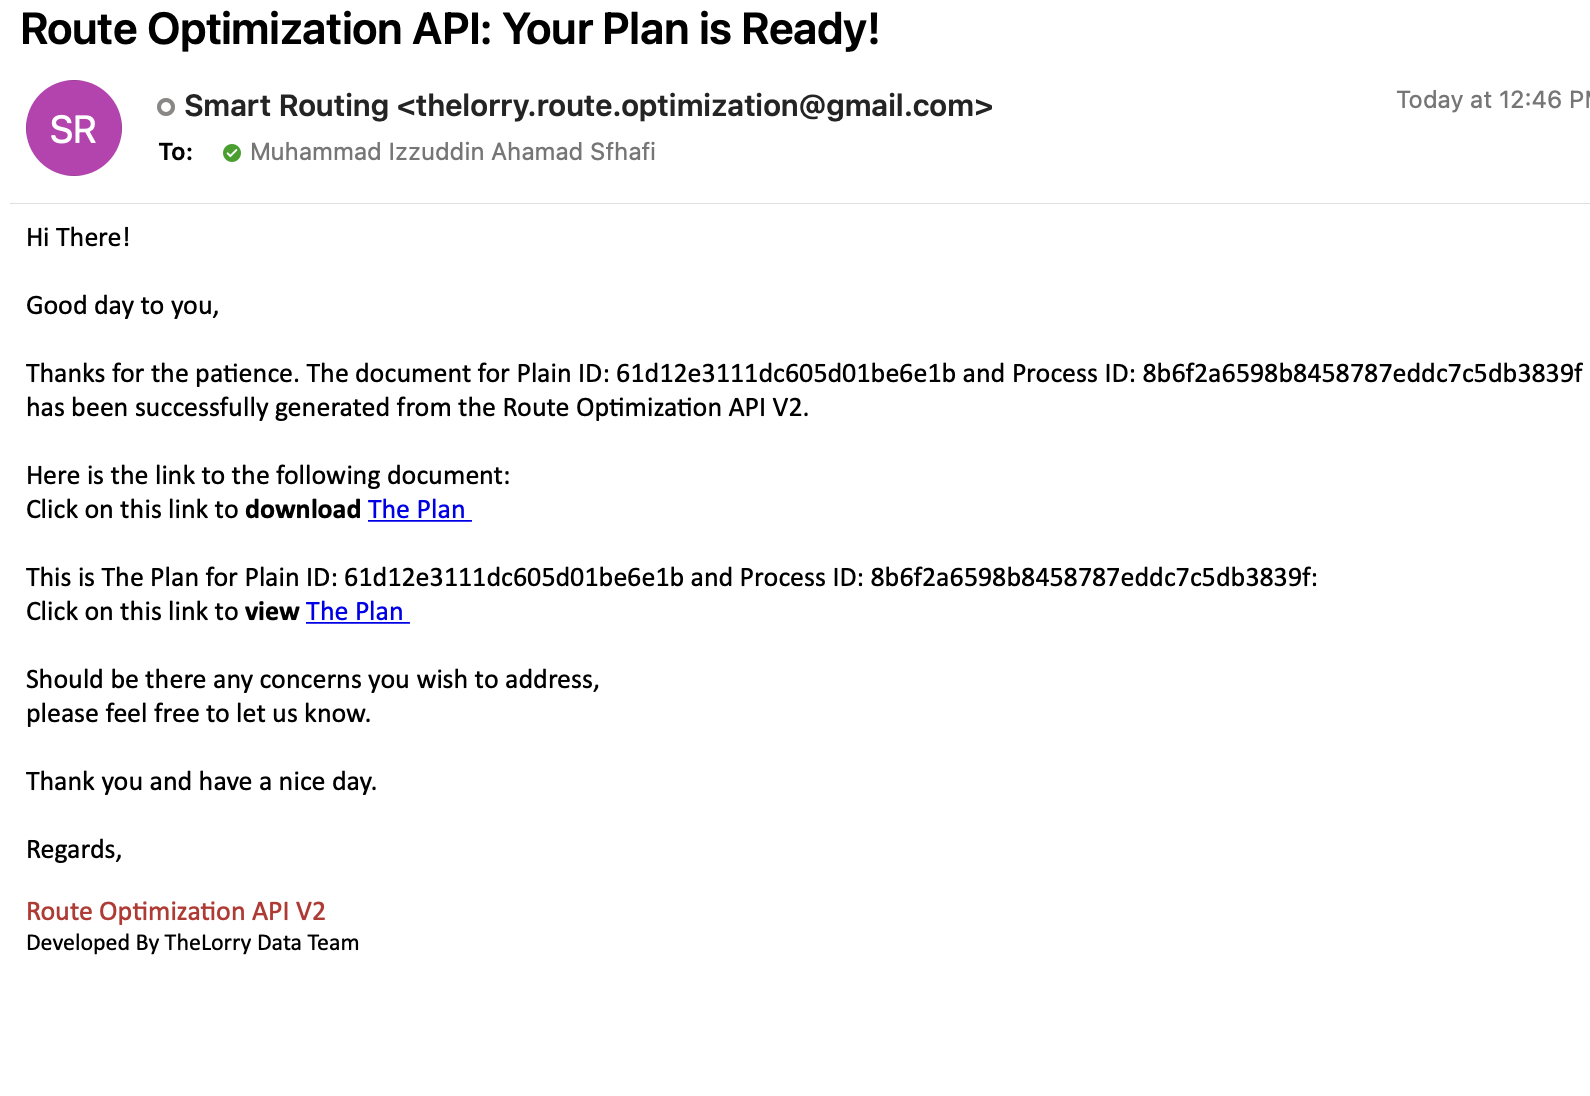
- Click view ‘The Plan’
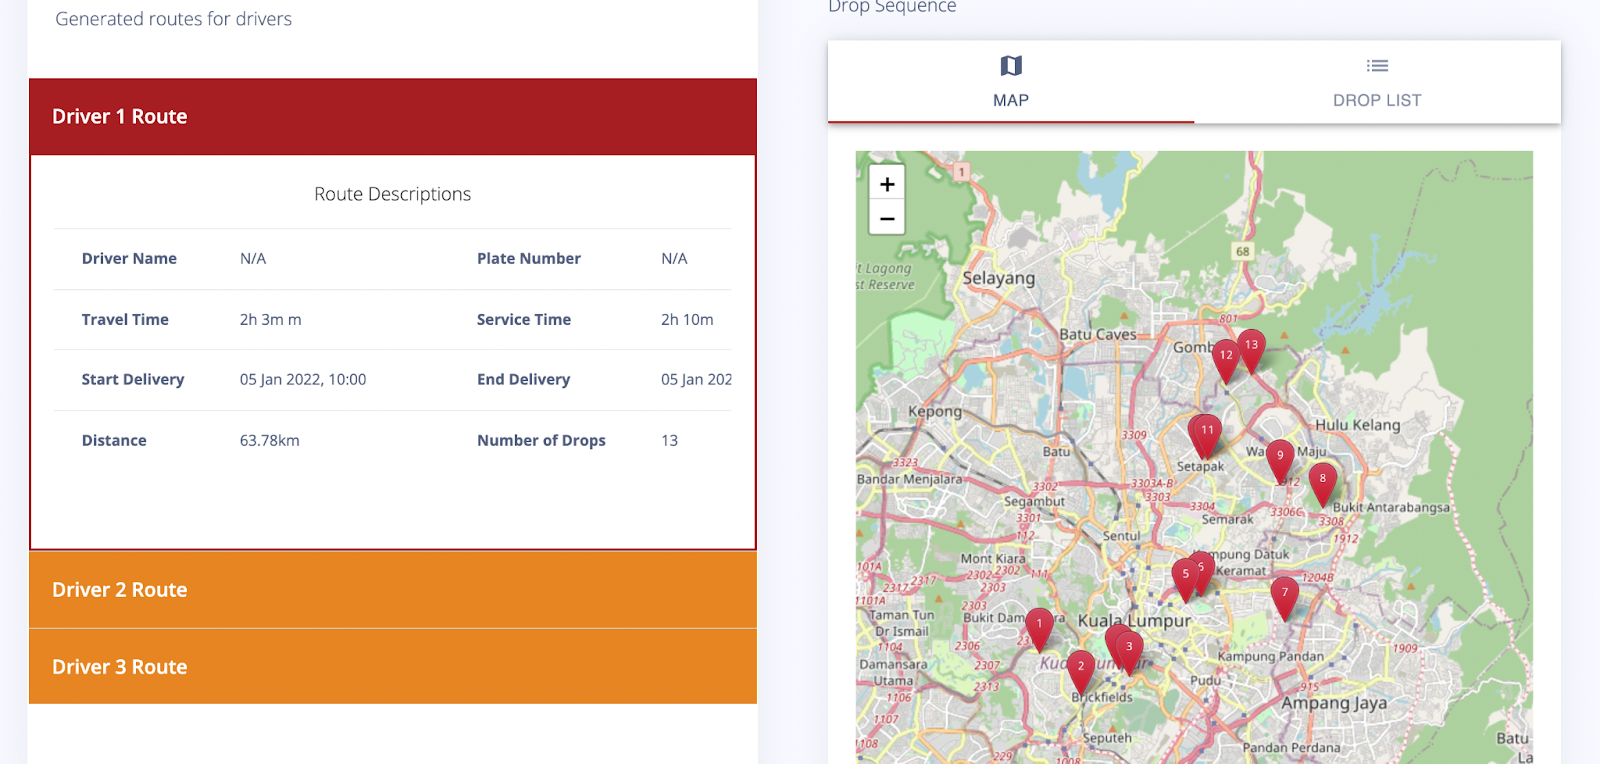
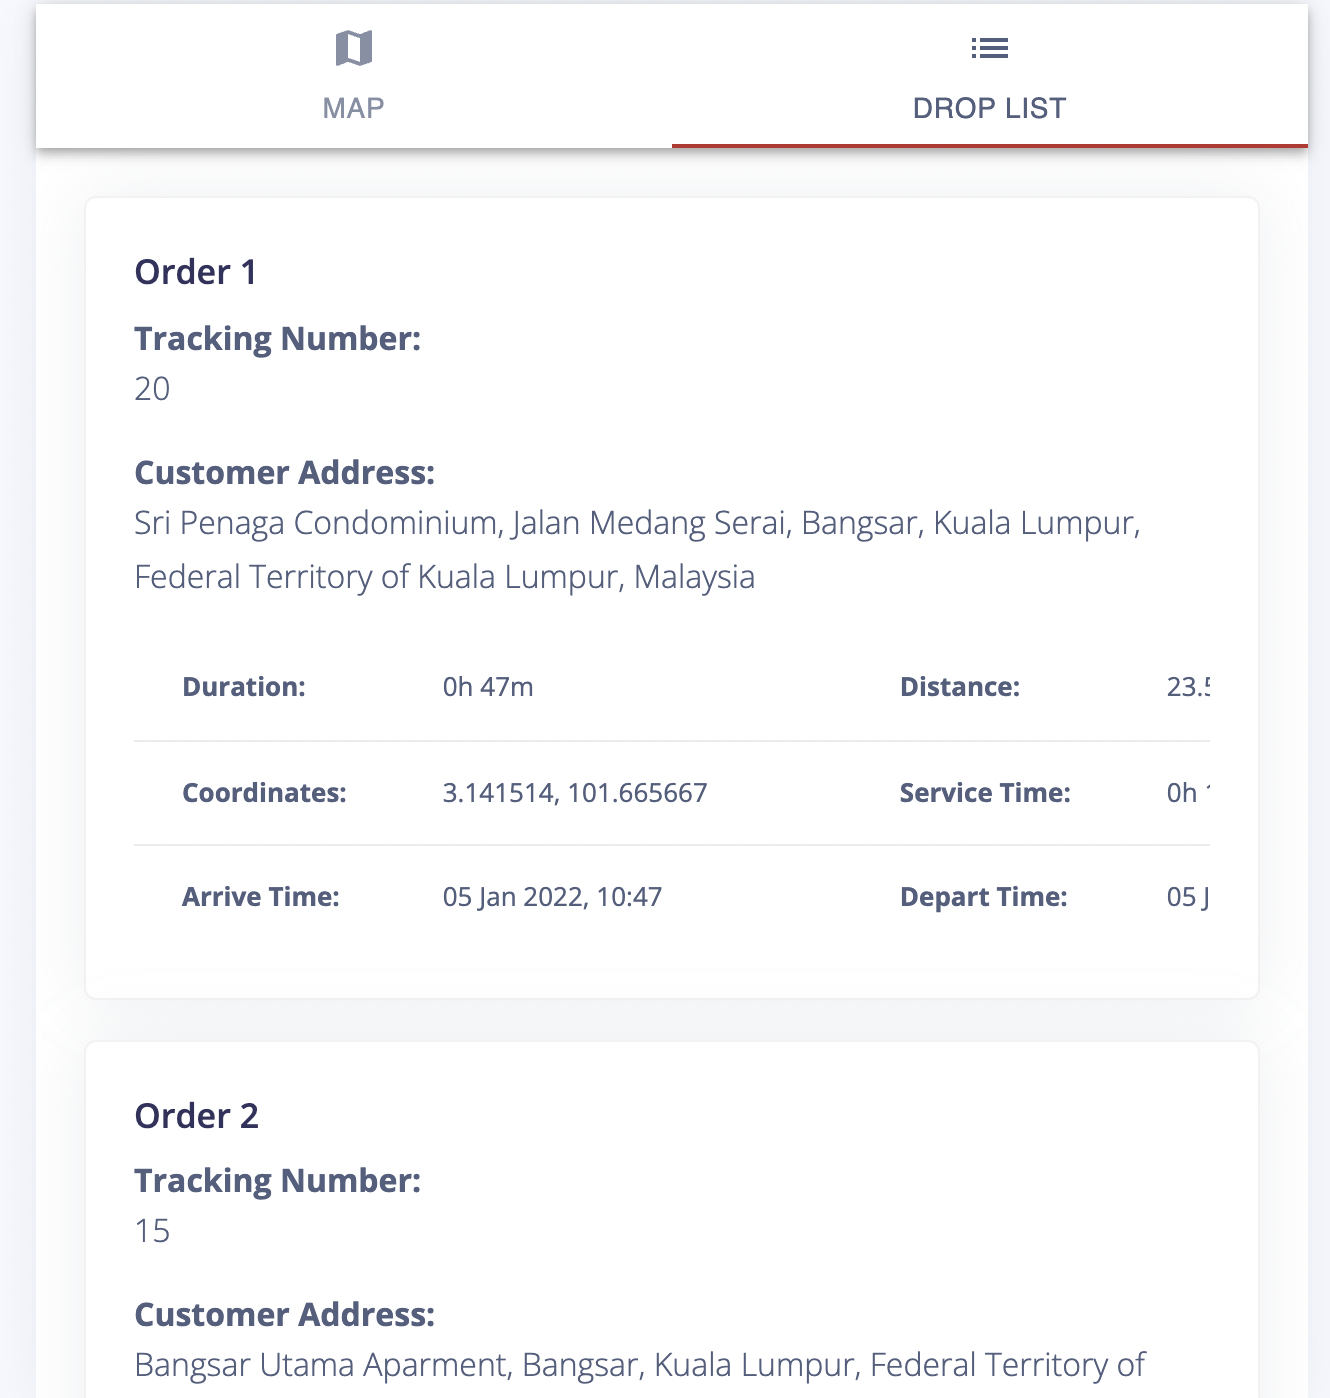
From here you will see the breakdown of the journey for each driver, and visualize the parcel drop-off sequence for each driver. If you click the ‘Drop List’, you can get the breakdown of each drop-off location.
- If you need to give the driver the route plan, you can click ‘Download File’ from the email. The file will have 4 tabs:
- Plan Summary
- Job Summary
- Drop Sequence Full
- Driver

- Plan Summary Tab
Will show the summary of the route plan such as:
- File creation DateTime
- The total estimated distance for the whole trip (in KM)
- The total estimated duration for the whole trip (in minutes)
- Number of vehicles required to perform all the drops
- Job Summary Tab
Show details trip of each driver

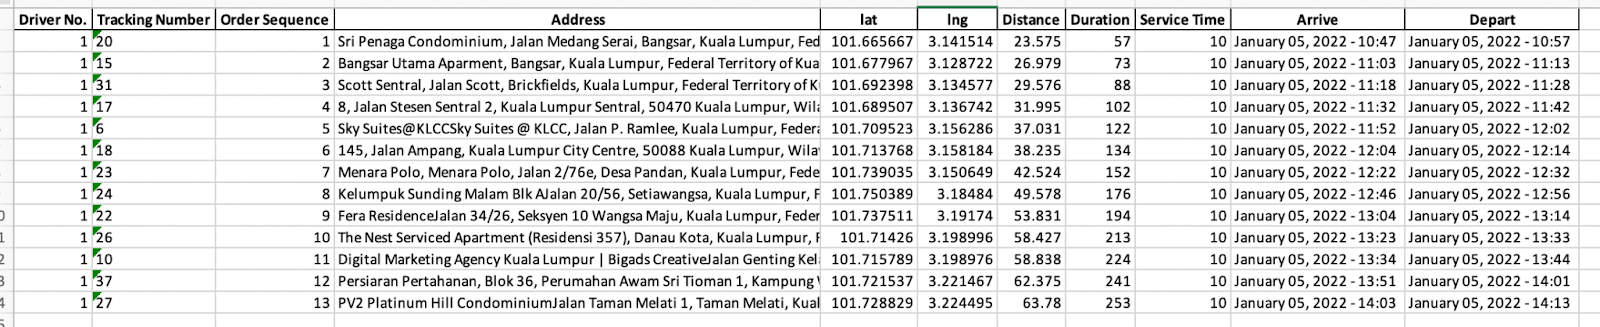
- Drop Sequence Full Tab, basically show details of each parcel drop activity, which contains:
- Driver No – driver ID that responsible for this particular address
- Tracking Number – parcel ID
- Order sequence – showing which parcel needs to be dropped first based on driver.
- Address – Customer Address
- Lat – Latitude of the customer address location
- Long – Longitude of the customer address location
- Distance – the distance between previous sequence to the current sequence in KM
- Duration – the duration between previous sequence to the current sequence in KM
- Service time – unloading activities duration by the driver at the customer address in minutes.
- Arrive – Arrival estimation DateTime to the customer address
- Depart – Arrival estimation DateTime from the customer address
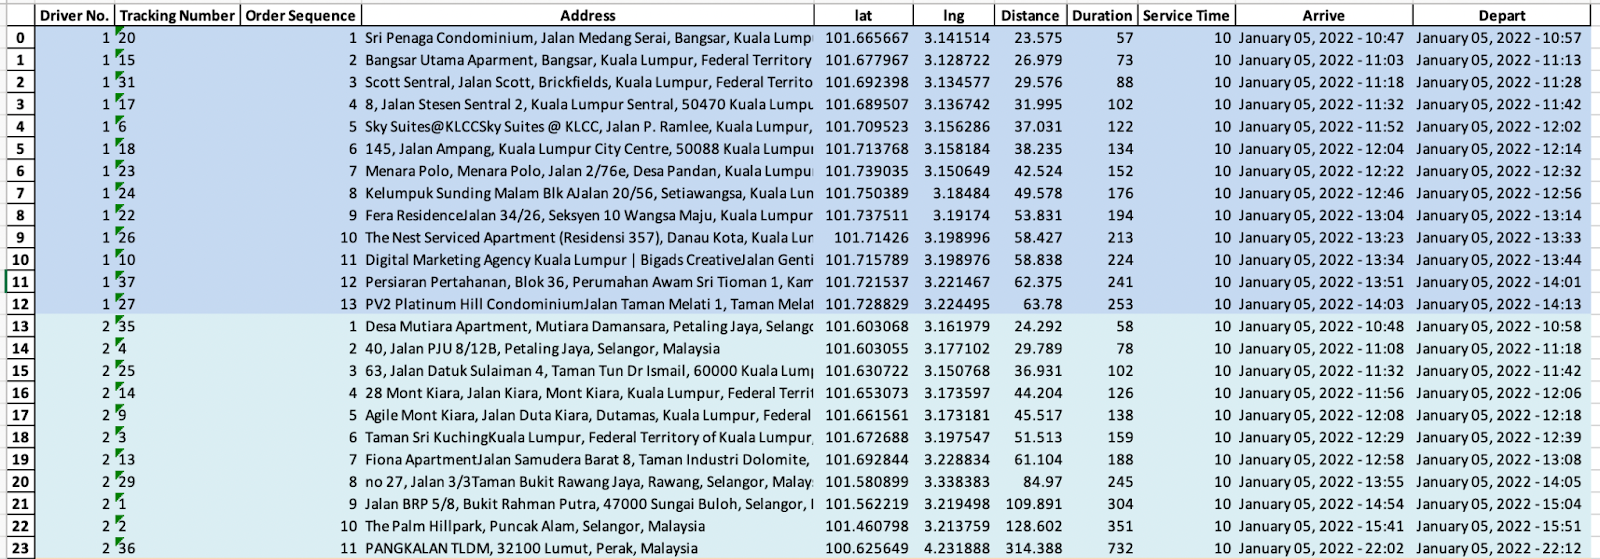
Note: Different colors here show different trip for each drivers
- For the Driver tab, one tab will be generated for each driver. For example, if you have 3 drivers required to deliver this job, there are going to be 3 driver tab (Driver 1, Driver 2, Driver 3)

- In each driver tab, you will get a sequence for each drop (based on their respective address)
We have reached the end of our guide. If you have any inquiry regarding our product, please reach our customer service for assistance.
 Switch Country
 Singapore
 Indonesia