Home Renovation Guide Malaysia & Singapore
8 Essential Steps for a Smooth Upgrade
by TheLorry on 13 August 2025.
Renovating your home is more than just picking paint colours — it’s a careful balance of planning, budgeting, and execution. Whether you’re upgrading a condo in Kuala Lumpur or renovating a BTO in Singapore, the right approach can save you money, time, and stress.
This Home Renovation Guide Malaysia & Singapore brings together expert insights, real cost estimates, and practical steps trusted by homeowners in both countries.
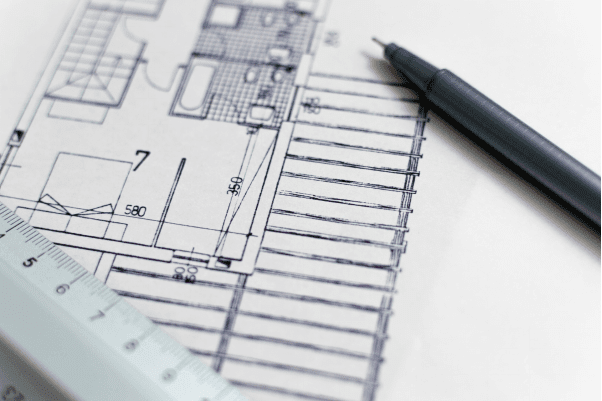
Step 1: Decide on Your Budget

Your budget determines every design choice you make.
In Malaysia:
-
A moderate renovation for a condo or apartment starts at around RM30,000, while landed homes often begin at RM50,000+ depending on scope.
-
Prices vary based on material quality and complexity of works.
In Singapore:
-
A 4-room BTO with major works (tiling, carpentry, electrical) typically starts at SGD35,000.
-
Resale units cost more due to hacking, waterproofing, and rewiring.
📌 Tip from experience: Keep at least 10–15% of your budget aside as a contingency fund. This protects you against unforeseen expenses like upgrading electrical wiring or replacing faulty plumbing.
Plan ahead for your move with TheLorry’s House Moving Package Malaysia.
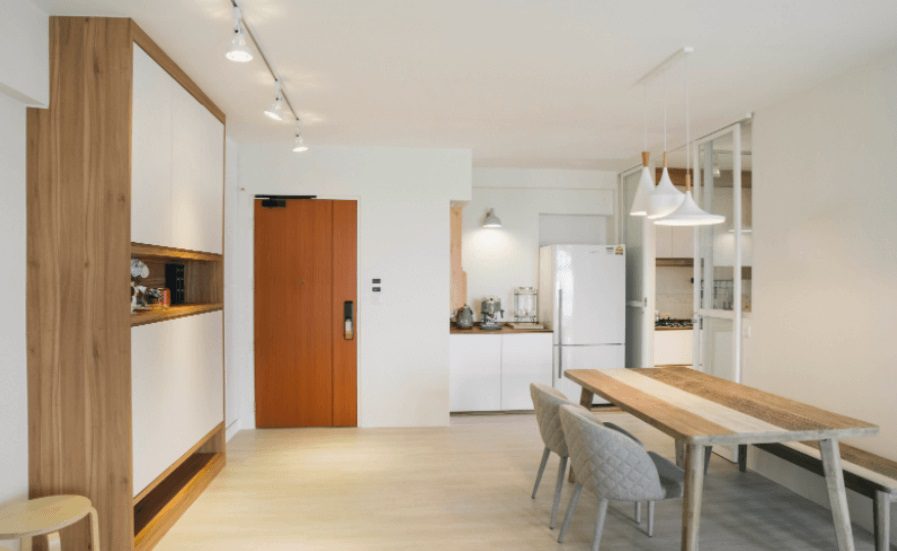
Step 2: Get Inspiration
This is the exciting part — turning your vision into reality.
Popular styles across Malaysia & Singapore:
-
Scandinavian Minimalism: Neutral colours, natural light, and functional storage.
-
Industrial Chic: Concrete floors, exposed pipes, dark wood furniture.
-
Muji-Inspired: Japanese simplicity with warm tones and clutter-free layouts.
Where to look:
-
Renonation (Singapore-focused)
-
HOMEDEC & Malaysia Interior Designers’ Association events for local trends.
Once you’ve settled on a figure you can part with, here’s where the fun begins. Bring out your Pinterest boards and start pinning looks and styles you like. Besides Pinterest, Singapore-based Renonation is another great resource for inspiration. The site features a wealth of renovation tips and interior design inspiration on their blog, so you can be sure to find something that will suit your fancy.
If you love the minimalist Japanese style that’s trending now for instance, take a leaf out of their article here.

At first, you’ll probably be overwhelmed by the inspiration you can find and you’ll want to pin everything you see. But here’s a tip: don’t.
You’ll only be more confused. Settle on a particular theme you like as soon as possible, whether it’s the clean aesthetics of the Scandinavian look or the grunginess of the industrial style and then do a focus and more purposeful research.
Step 3: Source for Your Interior Designer (ID)
A good ID bridges your ideas with practical execution.
Checklist before hiring:
-
Review portfolio projects that match your style.
-
Verify business registration & industry credentials.
-
Request at least 3 quotations for comparison.
In Malaysia: Browse Qanvast Malaysia or join renovation Facebook groups for real homeowner reviews.
In Singapore: Attend Meet the Designers events or explore Renonation’s directory.
Renonation offers a comprehensive directory listing of interior design firms on their website. You can navigate through their user-friendly platform to shortlist a few IDs that resonate with your style.

A screenshot of Renonation’s ID directory.
If that is still too much work for you, you can always fill up a form on their website, listing your preferred design style and budget.
The folks at Renonation will then link you up with IDs that will suit what you want and need. Once you’ve shortlisted a few IDs, make sure they have a good repute by reading online reviews. Then email them requesting for quotations. And if they got back to you with a quotation that is around your budget, set up appointments to meet up with them in person to see if they can work well with you.
It is important that you and your designer can communicate well together to prevent miscommunication and unhappiness down the road. The process can take a while, but it’s important to find a reliable interior designer that also takes into account your lifestyle needs and wants when it comes to designing your home.
With the increasing amount of renovation scams happening in Singapore, bear in mind these tips to safeguard your interests when sourcing for your ID.

🚫 Avoid scams: Never pay 100% upfront and insist on a clear contract with payment milestones.
This means you don’t have to make multiple appointments with different IDs over several weekends, saving you time and effort!
Step 4: The Waiting Period
Once you’ve chosen your ID and approved the design, you’ll pay a deposit (20–25%).
Permit Requirements:
-
Malaysia: Local municipal council approvals may be needed, especially for landed homes (structural changes, extensions).
-
Singapore: HDB units require an official HDB renovation permit and compliance with noise & work-hour restrictions.
Average Timelines:
-
Condos/Apartments: 1–2 months
-
Landed Properties: 2–4 months
Step 5: Shopping for Appliances and Furniture
Buy built-in appliances (hob, oven, fridge) first so your ID can plan cabinetry dimensions.
Malaysia Tip: Check warehouse sales in Klang Valley or Johor for high-quality items at reduced prices.
Singapore Tip: Explore appliance hubs like Harvey Norman Millenia Walk or factory outlets for deals.

Your ID will most likely let you know which appliances you’re supposed to get first and he will probably recommend you brands he has worked with.
But while you can take his advice, don’t follow blindly, do your own research because only you know best which brands will work for your needs and lifestyle.
Make sure the appliances you purchase can be delivered within your renovation period so your ID can help ensure that the installation is done right.
If you have the time, you can also do your furniture shopping. A few ID firms, besides coordinating your renovation, also do home styling, so you may want to rope them in when you’re shopping for furniture so that they can best find the pieces that will fit in with the rest of your theme.
Step 6: The Handover
Before signing off, inspect your home thoroughly:
-
Test plumbing and electrical outlets.
-
Check paint finishes, carpentry alignment, and flooring quality.
-
List defects for rectification before making the final payment.
This is the most exciting stage. Your renovation work is done and you can finally see the reality of your dream home. But just before you sign off, make sure your ID does a thorough inspection of your home with you.
Check to see if he or she has done everything stipulated in your contract. And re-negotiate if you spotted any shoddy work.
Step 7: Cleaning Up
Renovation dust is no joke — it can take weeks to settle.
Malaysia: Engage post-renovation cleaners from Kaodim or Recommend.my.
Singapore: Use companies specialising in post-reno cleaning for deep dust removal.
Before you move in, do a thorough cleaning of your home as a renovation can incur a lot of dust, stains and debris.
You can do so by either engaging a professional or doing it yourself. If you doing the former, ensure that the cleaning services company has a good track record. Another tip: make sure the company you’re hiring specialises in post-renovation cleaning.
Step 8: Moving In

Congratulations, you’re now ready to move into your new home! Engage a reliable moving company like TheLorry who offers on-demand booking for your home moving needs.
All you have to do is book a mover from their website or via their app and you’ll instantly be connected to a driver. The great thing is that their services are very transparent (pay more for extra services like packing) so you’ll know exactly what you’re paying for at the end.
This is the most rewarding stage — and also where TheLorry makes it easy.
On-demand booking, transparent pricing, and add-on services like packing mean you know exactly what you’re paying for.
Your Renovation Is Done — Now Let’s Get You Moved In Stress-Free
You’ve planned, budgeted, and brought your dream home to life — now comes the final step: moving in without breaking a sweat (or your back).
This is where TheLorry becomes your trusted partner. Whether you’re moving from a high-rise condo in Kuala Lumpur or into a newly renovated BTO in Singapore, our services are designed to save you time, protect your furniture, and give you peace of mind.
With transparent pricing, on-demand booking, and professional movers, you can focus on enjoying your new space instead of worrying about logistics.
Why homeowners choose TheLorry after renovations:
-
Tailored moving packages for condos, landed homes, and apartments
-
Add-on packing services to protect fragile renovation finishes and new furniture
-
Bulky item handling for heavy appliances, wardrobes, and pianos
-
Flexible scheduling so you can move in as soon as your renovation is completed
-
Cross-border moving options for those relocating between Malaysia and Singapore
Book your move now and step into your dream home with ease: Malaysia House Moving Package
Recommended Reads to Make Your Move Even Smoother
Before you pack the first box, make sure you’re armed with the right tips and know-how. These expert resources from TheLorry blog will save you time, stress, and money on moving day:
-
How to Hire a Lorry Transport in Malaysia – Moving in Malaysia isn’t just about picking the first lorry you find. This guide explains how to choose the right lorry size, understand pricing, and avoid common pitfalls — especially if you have large furniture or fragile items.
-
The Step-by-Step Guide to Packing When Moving Homes – Avoid broken items, lost essentials, and last-minute chaos. This detailed packing guide walks you through the process from labeling boxes to protecting delicate furniture.
-
How to Wrap Large Gift Boxes – Moving into a new home often means hosting friends or attending housewarmings. Learn the art of wrapping large, awkwardly shaped gifts so they look perfect on arrival.
By combining the right renovation plan with TheLorry’s professional moving services — plus these proven moving strategies — you can turn the end of your renovation into the beginning of stress-free living.
Frequently Asked Questions
How much does a home renovation cost in Malaysia and Singapore?
In Malaysia, a full renovation for a condo or landed home can range from RM40,000 to RM150,000 depending on materials, design complexity, and structural work. In Singapore, renovating a 4-room BTO flat can start from SGD 35,000 for major works, with resale flat renovations often costing more due to hacking and repairs. Always budget at least 10–15% extra for unforeseen expenses.
How long does a typical home renovation take?
Most renovations in Malaysia and Singapore take 1 to 3 months, depending on project size and permit approvals. Minor updates like painting or light carpentry may take only a few weeks, while full-scale remodeling can take longer, especially if you are importing materials.
Do I need permits for home renovation?
Yes, in both Malaysia and Singapore, certain works require approval.
Malaysia: You may need permits for structural changes, extensions, or electrical rewiring, depending on your local municipal council.
Singapore: HDB and BCA guidelines require permits for hacking, plumbing, and electrical works in flats and landed homes. Always check with your interior designer or contractor before starting.
How do I choose a reliable interior designer?
Look for designers with verified portfolios, strong client reviews, and proper business registration. Ask for at least three quotations, compare the scope of work, and ensure all details are in a written contract. In Singapore, platforms like Renonation help connect you with vetted IDs. In Malaysia, check for CIDB-registered contractors.
When should I start shopping for furniture and appliances during renovation?
Start sourcing built-in appliances (like ovens, hobs, hoods, and air conditioners) early so your designer can incorporate exact measurements into the layout. For furniture, begin shopping midway through the renovation to align delivery with completion dates, avoiding storage costs and delays.
What should I check before accepting the renovation handover?
Walk through your home with your designer and inspect:
- Finishing quality (paint, tiling, carpentry)
- Functionality of doors, windows, and built-ins
- Electrical and plumbing installations
- Compliance with the agreed design and materials
Flag any defects before signing off or making the final payment.
How can I make moving in after renovation easier?
Book a professional moving service like TheLorry for safe, efficient transport of furniture and appliances. Consider packing services to protect newly renovated walls and floors, and schedule the move after thorough post-renovation cleaning.
What’s the best way to avoid renovation scams?
Always work with registered, reputable contractors, avoid large upfront payments, and keep all agreements in writing. Check reviews on platforms like Google, Qanvast, or Facebook, and beware of offers that sound too good to be true.


 Switch Country
 Singapore
 Indonesia